
Coloring Book Envelopes
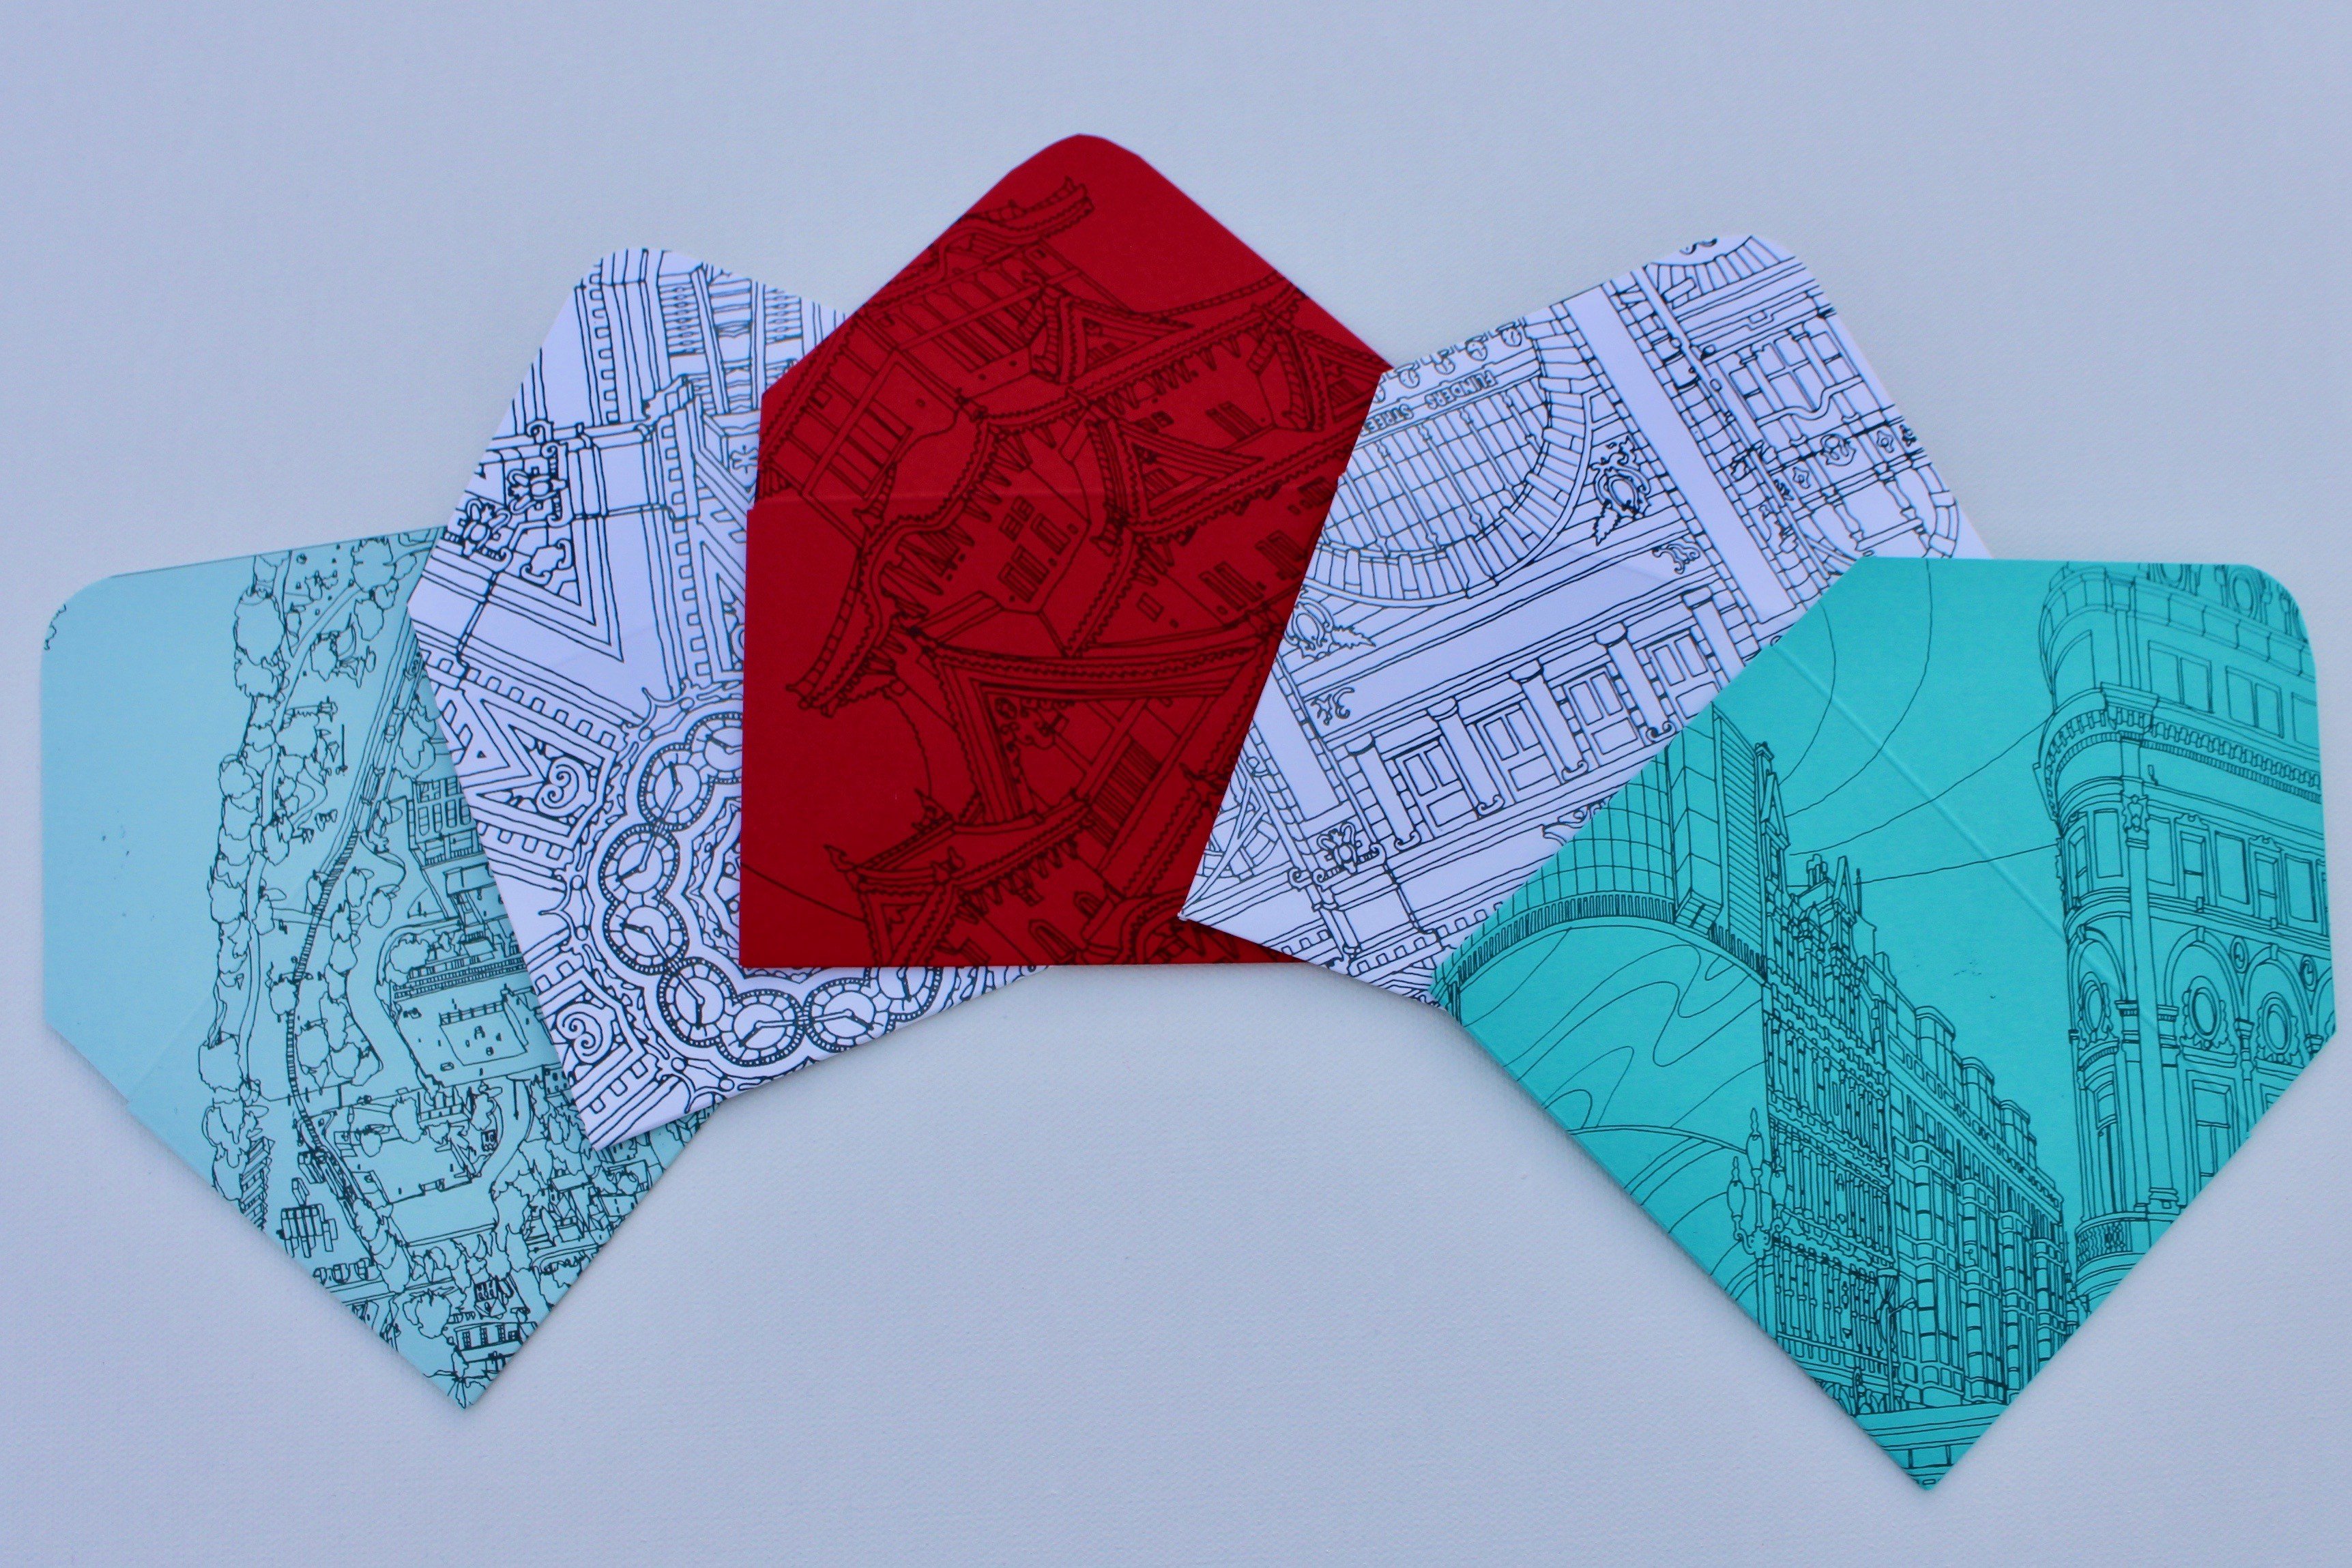
[vc_row css_animation=”” row_type=”row” use_row_as_full_screen_section=”no” type=”full_width” angled_section=”no” text_align=”left” background_image_as_pattern=”without_pattern”][vc_column][vc_single_image image=”6079″ img_size=”large” alignment=”center” onclick=”img_link_large” img_link_target=”_blank” qode_css_animation=””][/vc_column][/vc_row][vc_row css_animation=”” row_type=”row” use_row_as_full_screen_section=”no” type=”full_width” angled_section=”no” text_align=”left” background_image_as_pattern=”without_pattern”][vc_column][vc_empty_space][/vc_column][/vc_row][vc_row css_animation=”” row_type=”row” use_row_as_full_screen_section=”no” type=”full_width” angled_section=”no” text_align=”left” background_image_as_pattern=”without_pattern”][vc_column][vc_column_text]I was so inspired by adult coloring books and the many things that could be made out of it. These Coloring Book Envelopes are super easy and anyone can make them. This is a great project you can make yourself or with your kids! Perfect thing to send to anyone!
1. Start by choosing your favorite adult coloring book. I chose Fantastic Cities by Steve McDonald.
2. Choose a picture from it.
3. Make a copy of it on a paper of your choice.
4. Cut the copy of the design to the size of the envelope that you choose. I included how to make a 4 bar envelope below.
5. Color the card or just keep it the way it printed.
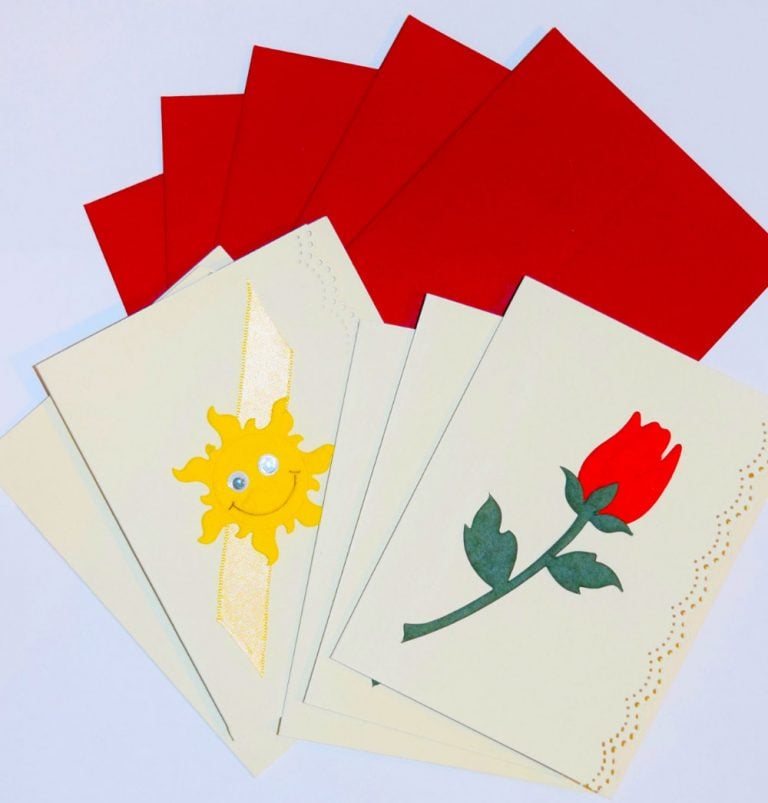
6. If you need to mail the card use a small label to put both addresses on it.
7. That’s it! Enjoy![/vc_column_text][/vc_column][/vc_row][vc_row css_animation=”” row_type=”row” use_row_as_full_screen_section=”no” type=”full_width” angled_section=”no” text_align=”left” background_image_as_pattern=”without_pattern”][vc_column width=”1/2″][vc_single_image image=”6074″ img_size=”large” onclick=”img_link_large” img_link_target=”_blank” qode_css_animation=””][/vc_column][vc_column width=”1/2″][vc_single_image image=”6080″ img_size=”large” qode_css_animation=””][/vc_column][/vc_row][vc_row css_animation=”” row_type=”row” use_row_as_full_screen_section=”no” type=”full_width” angled_section=”no” text_align=”left” background_image_as_pattern=”without_pattern”][vc_column][vc_empty_space][/vc_column][/vc_row][vc_row css_animation=”” row_type=”row” use_row_as_full_screen_section=”no” type=”full_width” angled_section=”no” text_align=”left” background_image_as_pattern=”without_pattern”][vc_column width=”1/2″][vc_column_text]How to make a 4 bar envelope:
1. Cut your paper to 7 5/8 IN X 7 5/8 IN.
2. Using a score board place the design part down so that the design side will be on the outside of the card.
3. Using a triangle edge piece that allows for a 45 degree angle place paper on scoreboard and by triangle. Score for a horizontal fold at 2 3/4 IN and for a vertical fold at 3 1/2 IN.
4. Cut the excess corners so that the card will allow for folding in.
5. Optional: Using a coin and/or scissors make the edges curves for the 4 points on the square.
6. Glue or tape the insides of the card carefully because you don’t want excess glue or tape to be showing or to hold anything on the inside of the card.[/vc_column_text][/vc_column][vc_column width=”1/2″][vc_single_image image=”6084″ img_size=”large” alignment=”center” onclick=”img_link_large” img_link_target=”_blank” qode_css_animation=””][/vc_column][/vc_row][vc_row css_animation=”” row_type=”row” use_row_as_full_screen_section=”no” type=”full_width” angled_section=”no” text_align=”left” background_image_as_pattern=”without_pattern”][vc_column][vc_column_text]Use these videos for reference:
- How to score your own envelopes (By Pam Sparks and its a great video)
- Using a coin or scissors to round your corners of your envelope (By GiftBasketAppeal also a really great video and also a perfect video if you want a A-2 envelope.)
[/vc_column_text][/vc_column][/vc_row][vc_row css_animation=”” row_type=”row” use_row_as_full_screen_section=”no” type=”full_width” angled_section=”no” text_align=”left” background_image_as_pattern=”without_pattern”][vc_column][vc_empty_space][/vc_column][/vc_row][vc_row css_animation=”” row_type=”row” use_row_as_full_screen_section=”no” type=”full_width” angled_section=”no” text_align=”left” background_image_as_pattern=”without_pattern”][vc_column width=”1/2″][vc_column_text]Papers used in this craft:
- Mohawk VIA Linen ~ Pure White 80lb cover
- Poptone ~ Wild Cherry 65 lb cover
- Poptone ~ Sno Cone 65lb cover
- Poptone ~ Blu Raspberry 65lb cover
[/vc_column_text][/vc_column][vc_column width=”1/2″][vc_gallery interval=”5″ images=”6085,6088,6087,6086″ img_size=”large” onclick=”custom_link” custom_links_target=”_blank” control_nav=”yes” show_image_description=”yes” custom_links=”#E-8_aHR0cHMlM0ElMkYlMkZ3d3cucGFwZXJwYXBlcnMuY29tJTJGbW9oYXdrLXZpYS1saW5lbi1wdXJlLXdoaXRlLTgtNS14LTExLWNhcmQtc3RvY2stODBsYi1jb3Zlci0yNS1way1kZnMuaHRtbCUyQ2h0dHBzJTNBJTJGJTJGd3d3LnBhcGVycGFwZXJzLmNvbSUyRmZyZW5jaC1wYXBlci1wb3B0b25lLXdpbGQtY2hlcnJ5LTgtNXgxMS02NWMtMTc1Z3NtLWxpZ2h0d2VpZ2h0LWNhcmQtc3RvY2stcGFwZXItMjUtcGstZGZzLmh0bWwlMkNodHRwcyUzQSUyRiUyRnd3dy5wYXBlcnBhcGVycy5jb20lMkZmcmVuY2gtcGFwZXItcG9wdG9uZS1zbm8tY29uZS04LTV4MTEtNjVjLTE3NWdzbS1saWdodHdlaWdodC1jYXJkLXN0b2NrLXBhcGVyLTI1LXBrLWRmcy5odG1sJTJDaHR0cHMlM0ElMkYlMkZ3d3cucGFwZXJwYXBlcnMuY29tJTJGZnJlbmNoLXBhcGVyLXBvcHRvbmUtYmx1LXJhc3BiZXJyeS04LTV4MTEtNjVjLTE3NWdzbS1saWdodHdlaWdodC1jYXJkLXN0b2NrLXBhcGVyLTI1LXBrLWRmcy5odG1s”][/vc_column][/vc_row][vc_row css_animation=”” row_type=”row” use_row_as_full_screen_section=”no” type=”full_width” angled_section=”no” text_align=”left” background_image_as_pattern=”without_pattern”][vc_column][vc_empty_space][/vc_column][/vc_row][vc_row css_animation=”” row_type=”row” use_row_as_full_screen_section=”no” type=”full_width” angled_section=”no” text_align=”left” background_image_as_pattern=”without_pattern”][vc_column][vc_gallery type=”image_grid” images=”6075,6076,6077,6078,6079,6080,6082,6083″ img_size=”large” onclick=”img_link_large” custom_links_target=”_blank” column_number=”2″ grayscale=”no” images_space=”gallery_without_space”][/vc_column][/vc_row][vc_row css_animation=”” row_type=”row” use_row_as_full_screen_section=”no” type=”full_width” angled_section=”no” text_align=”left” background_image_as_pattern=”without_pattern”][vc_column][vc_empty_space][/vc_column][/vc_row]


Those are cute.. Good job <3