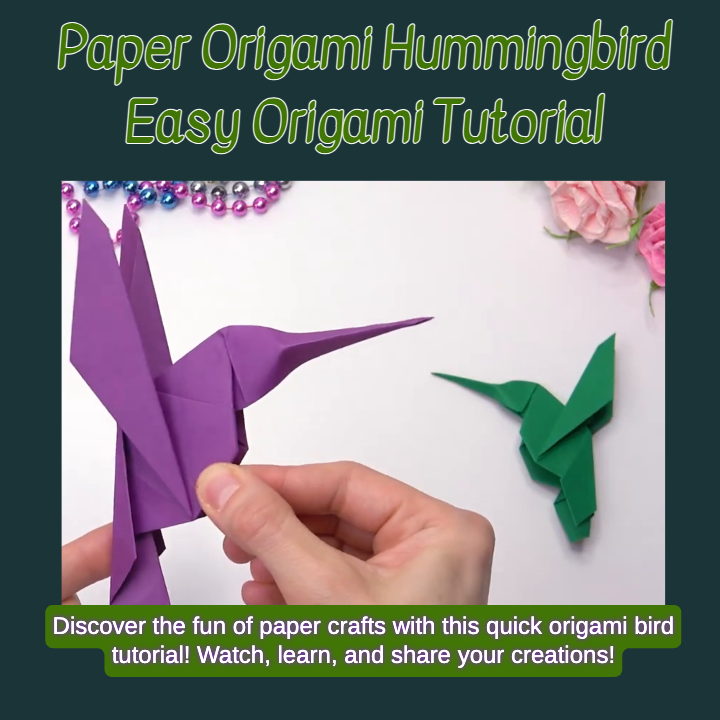
Paper Origami Hummingbird – Easy Origami Bird

Origami Hummingbird: Origami, the traditional Japanese art of paper folding, offers endless possibilities for creating shapes that are representational or abstract from a simple sheet of paper. Today, I propose to discover how to make an elegant hummingbird, a simple creation that will surely charm origami enthusiasts.
Materials Needed for Origami Hummingbird

For this project, you will need very few materials:
- A 20×20 cm square sheet of paper
- Your hands, clean and dry
- A little patience and precision
Step 1: Preparing the Paper


Start by selecting your paper. Colored or patterned papers can add interesting visual effects to your hummingbird. Make sure the paper is neither too thick nor too thin; standard origami paper is ideal.
Step 2: The Basic Fold

Precisely folding the paper in key steps is crucial to achieve the desired shape:
- Fold your square paper in half diagonally to form a triangle.
- Open the paper, then fold it along the other diagonal.
- With the paper flat, bring the two sides of the square towards the center line, forming a smaller triangle.
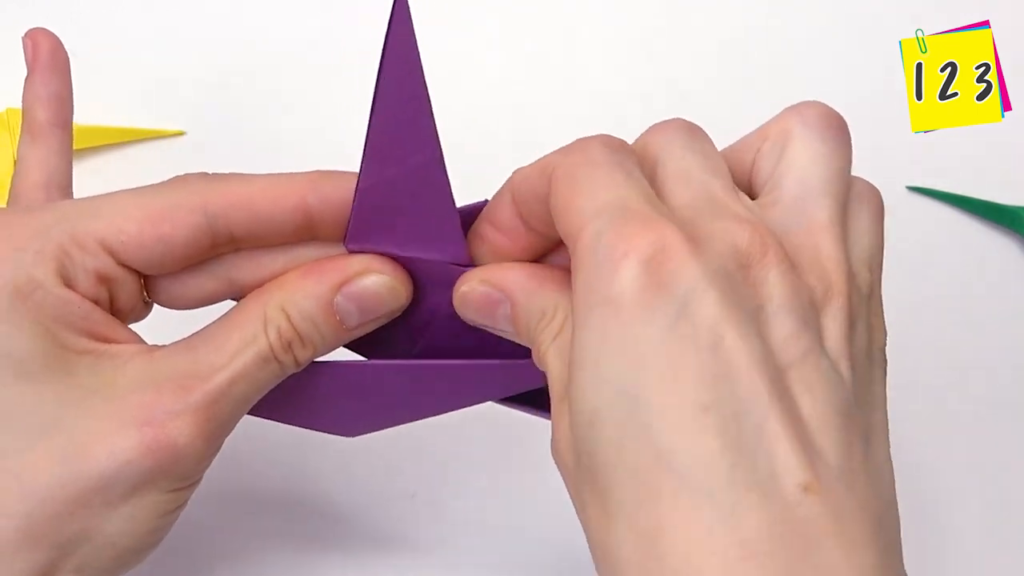
Step 3: Form the Origami Hummingbird’s Body

This segment requires a bit more dexterity:
- Starting with the small triangle, fold one of the upper tips backwards to form the bird’s head.
- Adjust the folds to refine the shape of the head and beak.

Step 4: Finishing Touches
To complete your bird:
- Slightly fold the wings to give them a more realistic, dynamic look.
- You can use a pen to add details like eyes or patterns on the wings.

Useful Tips
- Precision is key in origami. Take your time to properly crease each fold.
- If you make a mistake, don’t panic! You can often unfold and re-fold.
Origami is more than just folding paper; it’s an art of mindfulness, precision, and expression. While it might seem complex at the beginning, remember that with practice, creating complex models will become second nature. Keep experimenting with different colors and sizes, and perhaps next time, you’ll build an entire flock!

I hope you’ll take as much pleasure creating this hummingbird as I had sharing this guide with you. Happy folding!
Don’t forget to share your creations on social media and tag friends who might also be interested in this wonderful art of paper folding. Follow this blog for more origami tutorials and inspiration!

Watch the complete video on Youtube. Follow the talents of:
123 Easy Paper Crafts DIY