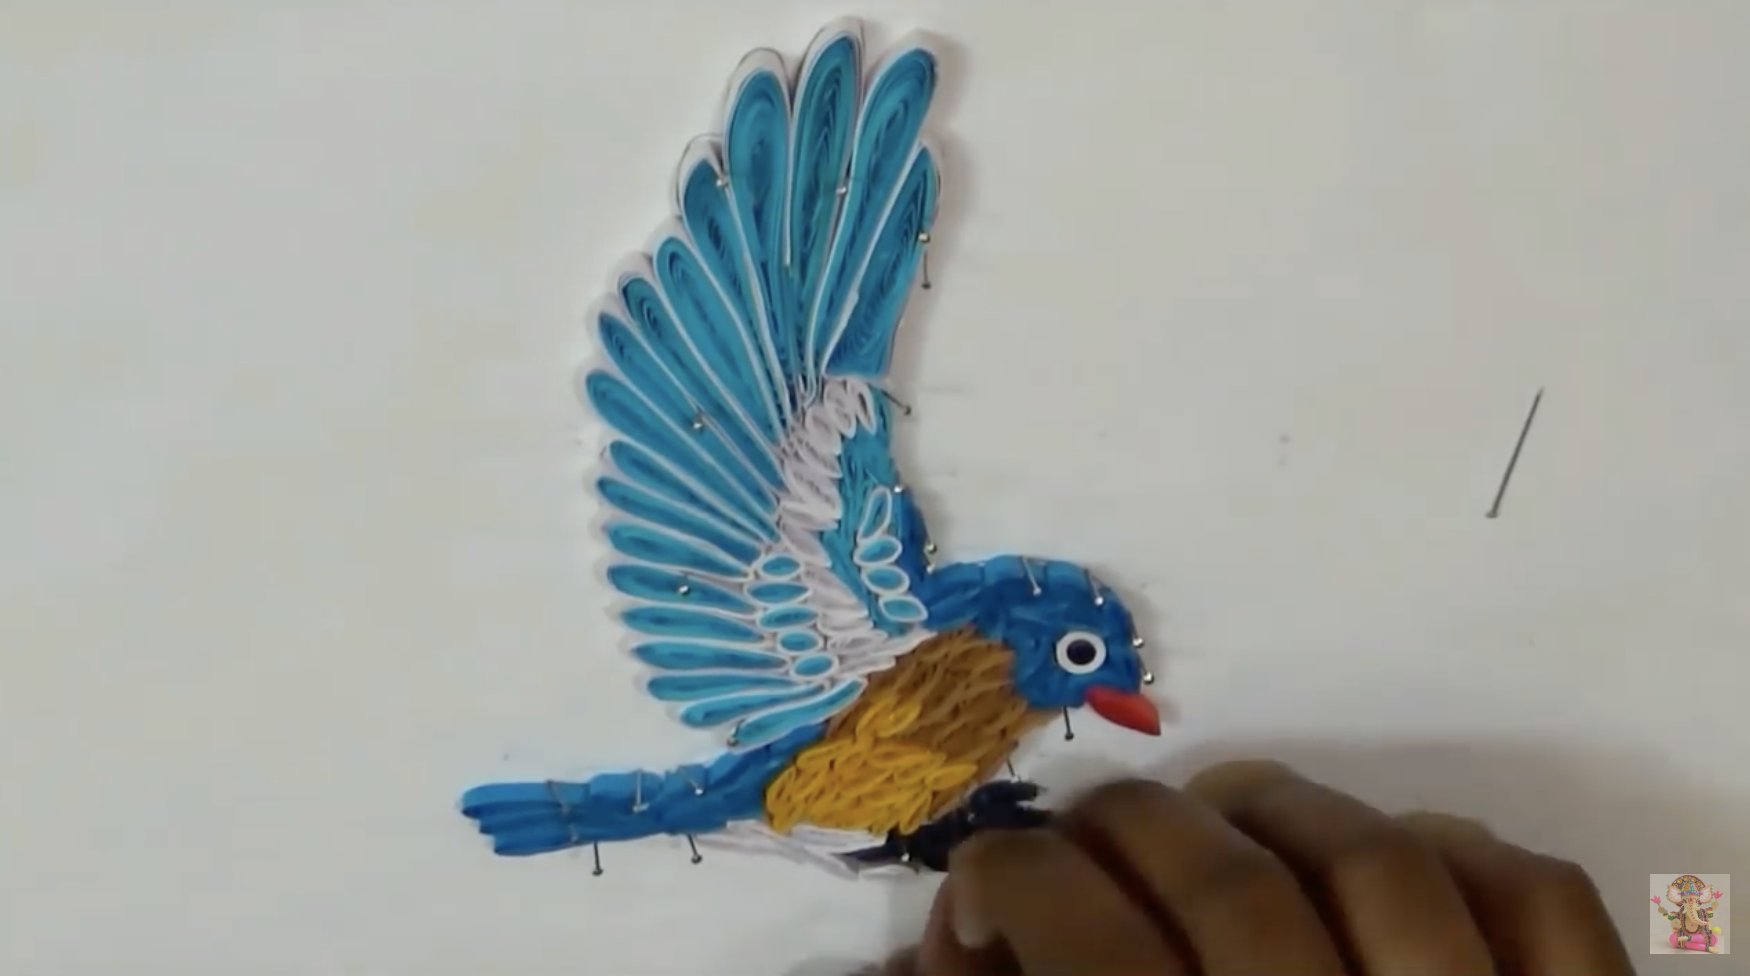
How to Make a Beautiful Quilling Bird

Youtube Video by: Paper Quilling Art
In the world of paper art, only a handful of forms pour out as much elegance as quilling. This technique involves using rolled and shaped paper strips to create graceful decorative art. For this post, we will be exploring how to use quilling to create a magnificent bird that will fly high on your cabinet or stand.
What Do I Need to Make a Paper Quilled Bird?
To follow along with this quilled bird tutorial, you may need the following items:
- Some Paper Strips
- A Slotted Quilling Needle Tool
- Pins
- A Quilling Mini Mold
- A Crimper Tool
- Glue
- Border
- A Pair of Scissors
Steps to Follow When Making a Quilled Bird
Lets Explore the Steps.
1. Draw Your Bird Outline
Having an outline always helps when quilling. Grab your pencil and draw the shape of the bird you would like your quilled art to emulate.


2. Make Larger Coils By Attaching Multiple Strips
Once you have a good grasp of making small coils, you can begin forming larger structures. For this step, you will need between two to four paper strips. Once you have set these out, take each strip and glue them at the end until it takes the shape of one long strip. Once the glue has set in, repeat the looping method from the previous step.
For this step, we also recommend pushing down on your coils until they take on an oval shape, as these longer spirals will often act as their feathers.
This technique will help give your bird a more dynamic form and provide a more elegant appearance. Depending on the shape of your bird, you may also have to repeat this step a few times.

3. Attach Coils to Your Bird
For this step, we will be attaching our coils to the outline we created earlier by using glue and pins to ensure our spirals stay in shape. Begin by placing your coils on your drawing, starting with the edge of your bird’s body and working your way inwards.
Each spiral we attach here will be final so make sure to use the colors you love. Remember, you can always make coils with any color, so do not hesitate to switch up.

If you discover that new attachments are pushing existing coils out of place, you may place pins around the structure, as they will act as barriers to your quilling. Once you have finished attaching all the coils and your shape is now covered in paper spirals, feel free to remove the pins and enjoy the full beauty of your bird quilling.


What Can I Do With My Paper Quilling?
Quilling is a beautiful art form that is easy to learn and put on display. Once you have made your quilling, you can frame it and put it on show in several parts of your house, such as your cabinet or stand. Alternatively, you may also use a quilling as an ornament for various items such as drawers or lockboxes.