Be My Valentine – Candy Filled Valentine

Love and candy will win your True Love’s heart. So the best way to say Be My Valentine than with a Candy Filled Valentine! Make sure to check out all the instructions below on how to make your very own for your special someone!
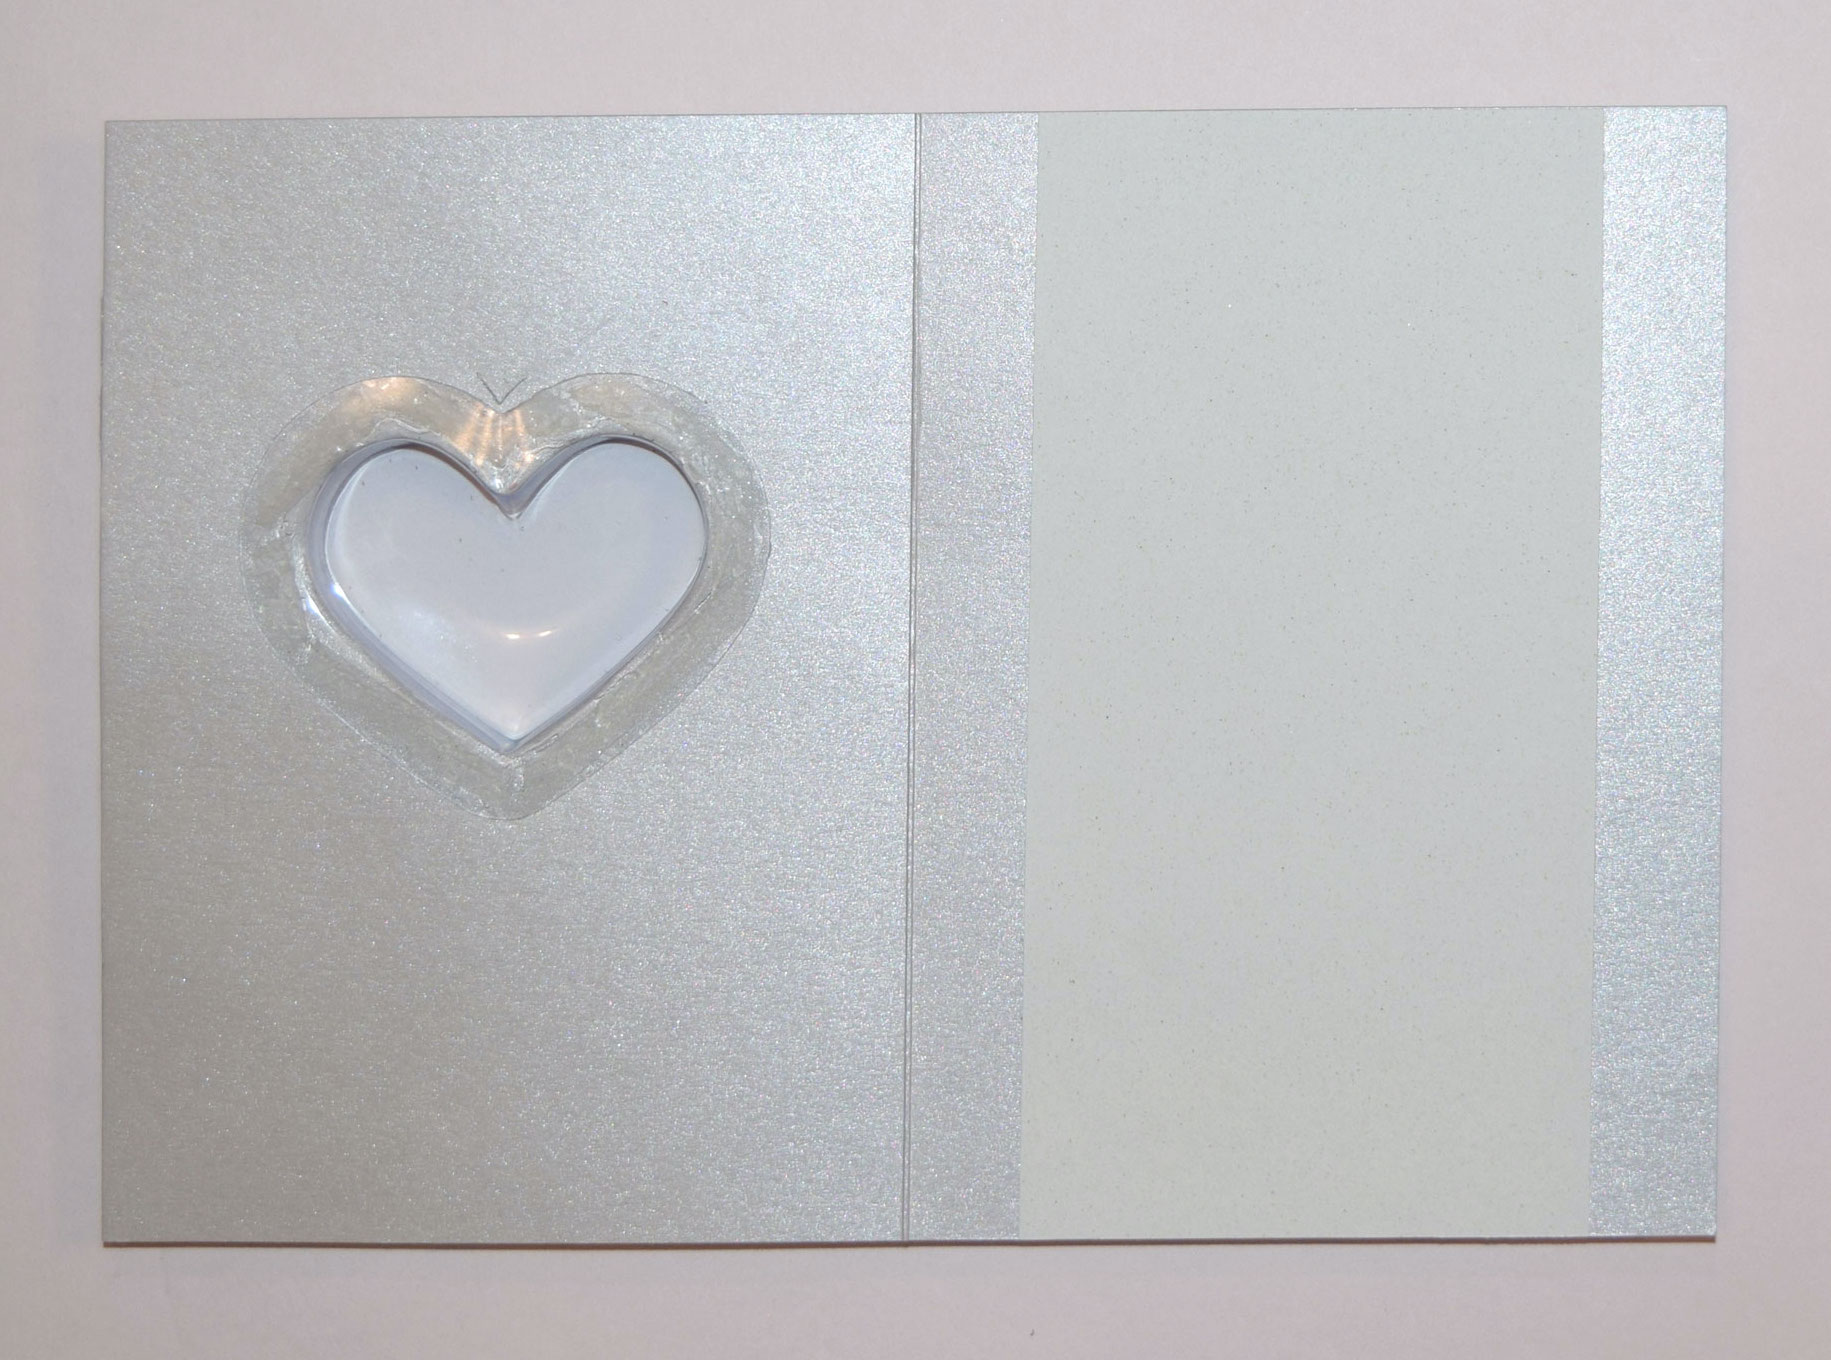
The card has a little embossing and series of hearts that fit inside each other; the lips are optional and add some fun. To eat the candy, pull off the heart on the inside. This card had a treat box that is part of the fun but will need to be put in a padded envelope if you mail it. The 5-inch x 7-inch final card will fit into the Curious Metallic, Lustre, A7 envelope, but it is doesn’t lie flat due to the treat box. Referring to the red and silver paper, I used the last of some Recollections papers. You can substitute PaperPapers Glitter Papers, Red & Silver.

The hearts are from 2 different sets. Sizzix Dies 657561 and the small one that fits around the treat cup: Creative Expressions, Heart Shaped Treat Cups. The treat cups are designed to fit with Sue Wilsons Creative Expression line. If you don’t want to buy the extra die you can use one of the Sizzix Heart dies, but the closest one is a little big however the plastic from the cup will cover the hole. When you put the ScorTape around the plastic cup to attach it to the front, add some glitter to cover the exposed tape. It will look great. I embossed the front first in case it didn’t work out, but the stencil was great. Refer to the photos and the materials list for paper sources.
Instructions for Candy Filled Valentine:
- Using Curious Metallic, Lustre ,111lb cover, cut it to 7-inch wide and 10-inch long. Score and fold it in the middle to 5-inch x 7-inch. Use Dreamweaver Metal Stencil, Be My Valentine, and tape it down with blue painter’s masking on all 4 sides. Emboss it with Dreamweaver Stencils, Embossing Paste, Metallic Gold. I removed the tape and stencil right away. Dreamweaver paste sits up fast, but I did let it dry well before did the next step.
- Cut 2 hearts for the front, the red and the silver, and 1 for the inside, a large red one. The hearts are from Sizzix; use the 5 3/8-inch, 3 1/2-inch, and 4 1/2-inch. Cut the 5 3/8-inch and the 4 1/2-inch hearts from the Red Holographic Hearts Scrapbook Paper, 12-inch x 12-inch. Cut the 3 1/2-inch from Silver Corrugated Glitter Paper by Recollections, 12-inch x 12-inch.
- The hearts are embedded on the front; the silver is inlaid into the red. The silver heart is 3 1/2-inch so die cut this shape into the red heart. The red you see behind the candy is from the inside overlay heart with the lips on the back that is 4 1/2-inch wide. The 3 1/2-inch silver heart also has a heart cut out of it. This is from Sue Wilson’s Creative Expressions, Fillables, Jewelled Heart. Several of her die-cut sets have the same little heart, so use what you want. The little Sue Wilson heart is 2 1/2-inch wide and not the same basic shape as Sizzix. It is the same size as the treat cup.

- After making sure the silver heart inlays into the red heart, attach the 5 3/8-inch heart to the front with 1/2-inch ScorTape. I made some pencil marks at the top. The heart is wider than the card. Trim that last.
- With the red heart attached, put in the silver heart without taping it down so you can use a pencil and trace the shape of the little heart for the treat box. Since I had already embossed it, I removed the silver heart and cut the outline with an Exacto blade. Make sure the Sue Wilson, Creative Expressions – Heart Shaped Treat Cup fits through the heart. You can sand the edges with a nail file.
- Once you are sure everything fits where it should attach the silver heart with ScorTape. Attach the treat cup from the inside. Use the ScorTape on the top edges of the treat cup and add some Cosmic Shimmer Acrylic Glue and push it through the tiny heart you just cut out. Hold it until it dries a bit. Cover the back of the treat cut edges with 1/8-inch ScorTape and some glue right before you use it.

- The inside heart holds in the candy inside the treat cup. The 4 1/2-inch heart is cut from the red holographic paper. The back of the paper is white so I stenciled a kiss on it. This is optional but very cute. The stencil was Lips 783-B230 Stencil (3-inch) from Kato’s Baking supplies on Etsy. The stencil is Mylar, but thin. I didn’t think I could run an embossing knife over it with all the little lines, so I used The Essential Glue Pad and Pearl-Ex powder. Tape around the stencil with blue masking tape making sure no glue will get on the paper outside the stencil. Refill the glue pad and remove the stencil, put the stencil in a bowl of alcohol. I brushed a lighter color on the inside and darker around the outside of the lips: Pearl-Ex: Flamingo Pink & Blue Russet. I sealed it with some spray acrylic sealer. Since you are pulling off the Heart/Lips add a pull tab to the bottom of the heart. I used Martha Stewart’s Photo Corner and cut off the extended tab and glued it in place.
- Before you fill the box, do the message plate. Cut Crush, White Corn, 81lb text, cut it to 3 1/2-inch wide and a little longer than 7-inch. I like to trim it after attachment. Use 1/2-inch ScorTape to center the White Corn and trim the bottom.
- Open the card and pull off the backing of the 1/8-inch ScorTape. Fill the treat box with some Brach’s Tiny Conversation Hearts. Add some glue and push the 4 1/2-inch heart onto it, with the lips facing up. I used little pencil marks to guide me. Cover the lips with a piece of paper and push it down until it sets up a bit. Trim the red heart on the front to the edges of the folded card.
You are done, enjoy!
Materials for Candy Filled Valentine:
- Curious Metallic (check out either Silver Paper or Silver Envelopes)
- Lustre, 111lb cover
- Lustre, A7 envelope
- Crush
- White Corn, 81lb text
- Dreamweaver Metal Stencil, Be My Valentine
- Dreamweaver Stencils, Embossing Paste, Metallic Gold
- Blue painter’s masking tape
- Red Holographic Hearts Scrapbook Paper, 12″ x 12″ (Hobby Lobby)
- Silver Corrugated Glitter Paper by Recollections, 12″ x 12″(Michaels)
- Sue Wilson, Creative Expressions – Heart Shaped Treat Cups, at Walmart also
- Sue Wilson Dies – Fillables – Jewelled Heart (just the small heart)
- Sizzix Framelits Die Set 6/PK – Hearts
- Lips 783-B230 Stencil (3″) from Kato’s Baking supplies on Etsy
- The Essential Glue Pad and Refill
- Pearl-Ex: Flamingo Pink & Blue Russet
- Martha Stewart Crafts Photo Corners, Silver Glitter
- Brach’s Tiny Conversation Hearts
- ScorTape, 1/8″ * 1/4″
- Cosmic Shimmer Acrylic Glue
- Spray Acrylic Sealer