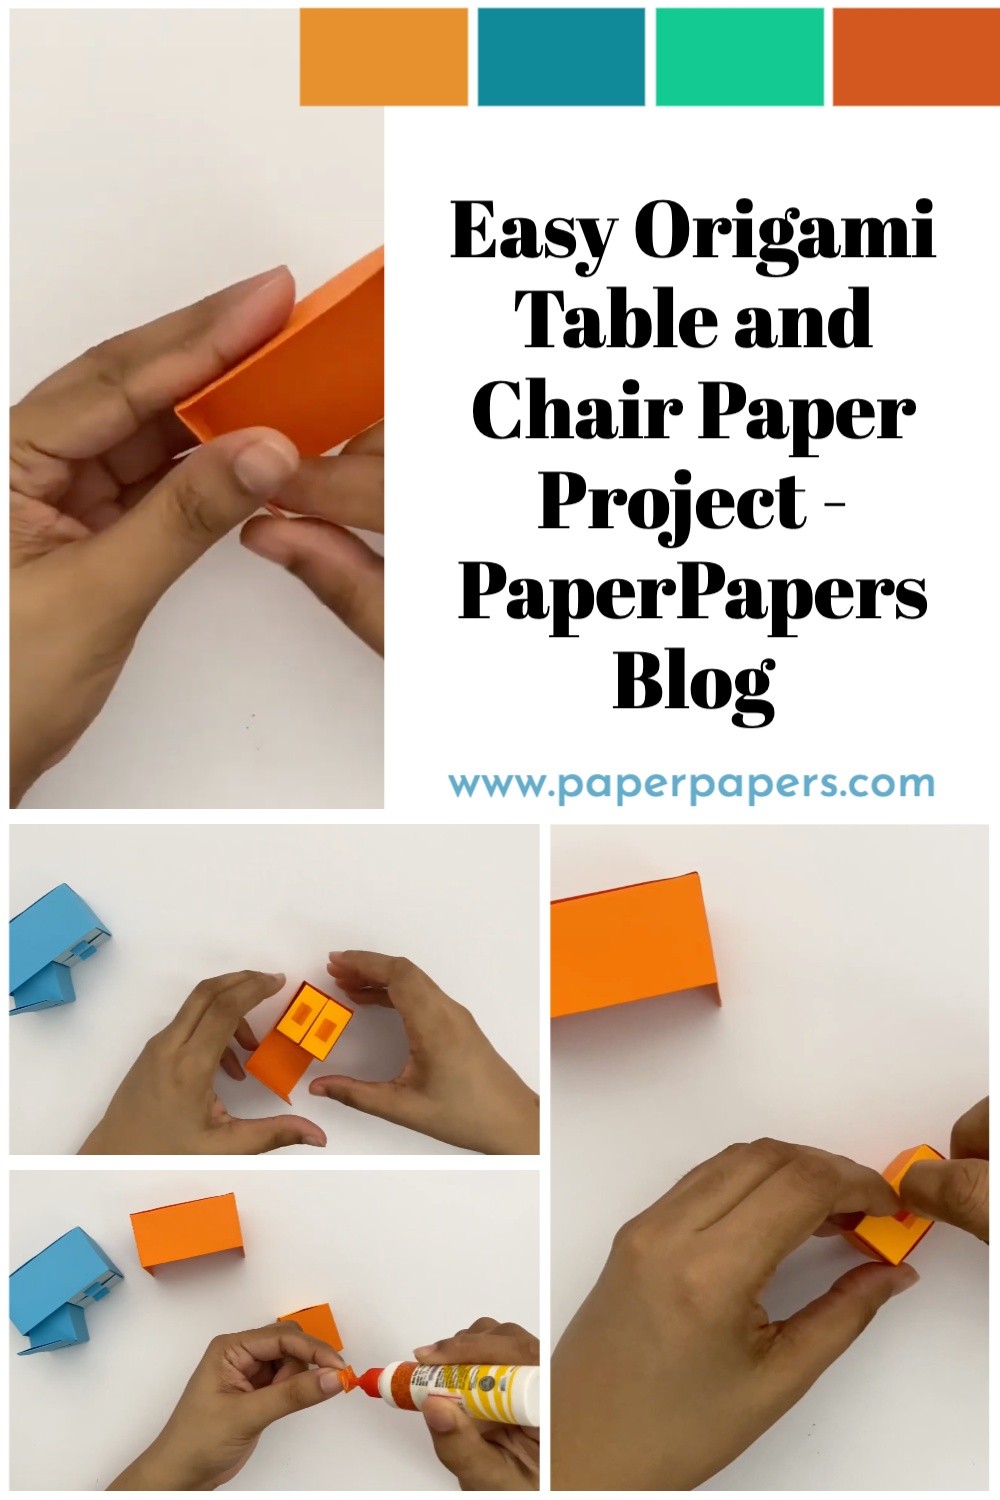
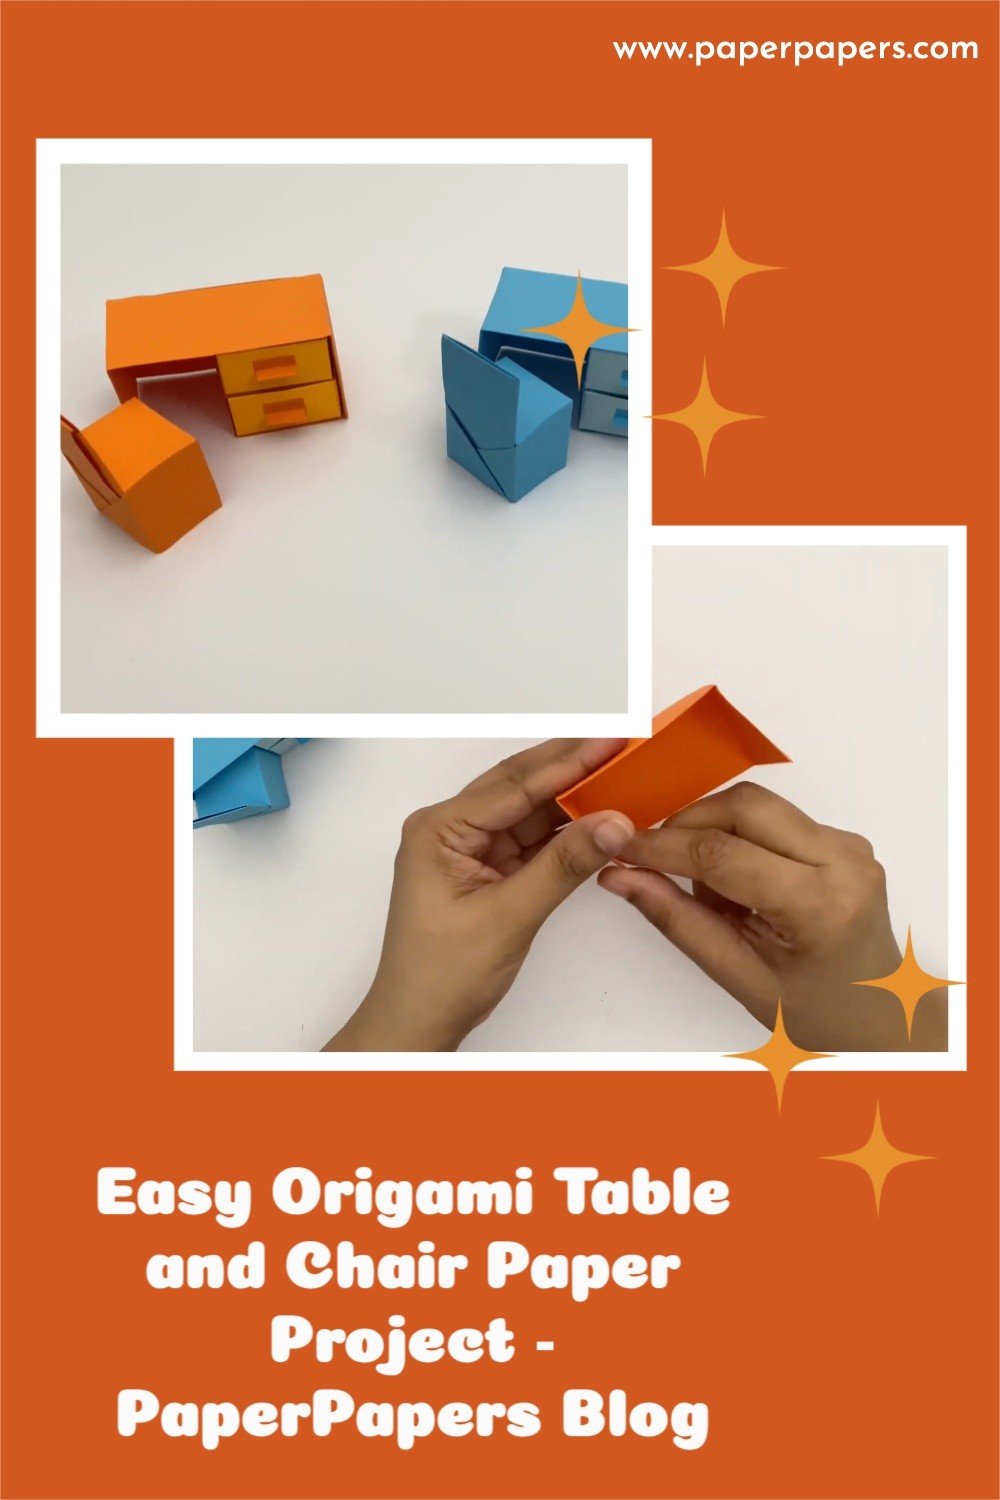
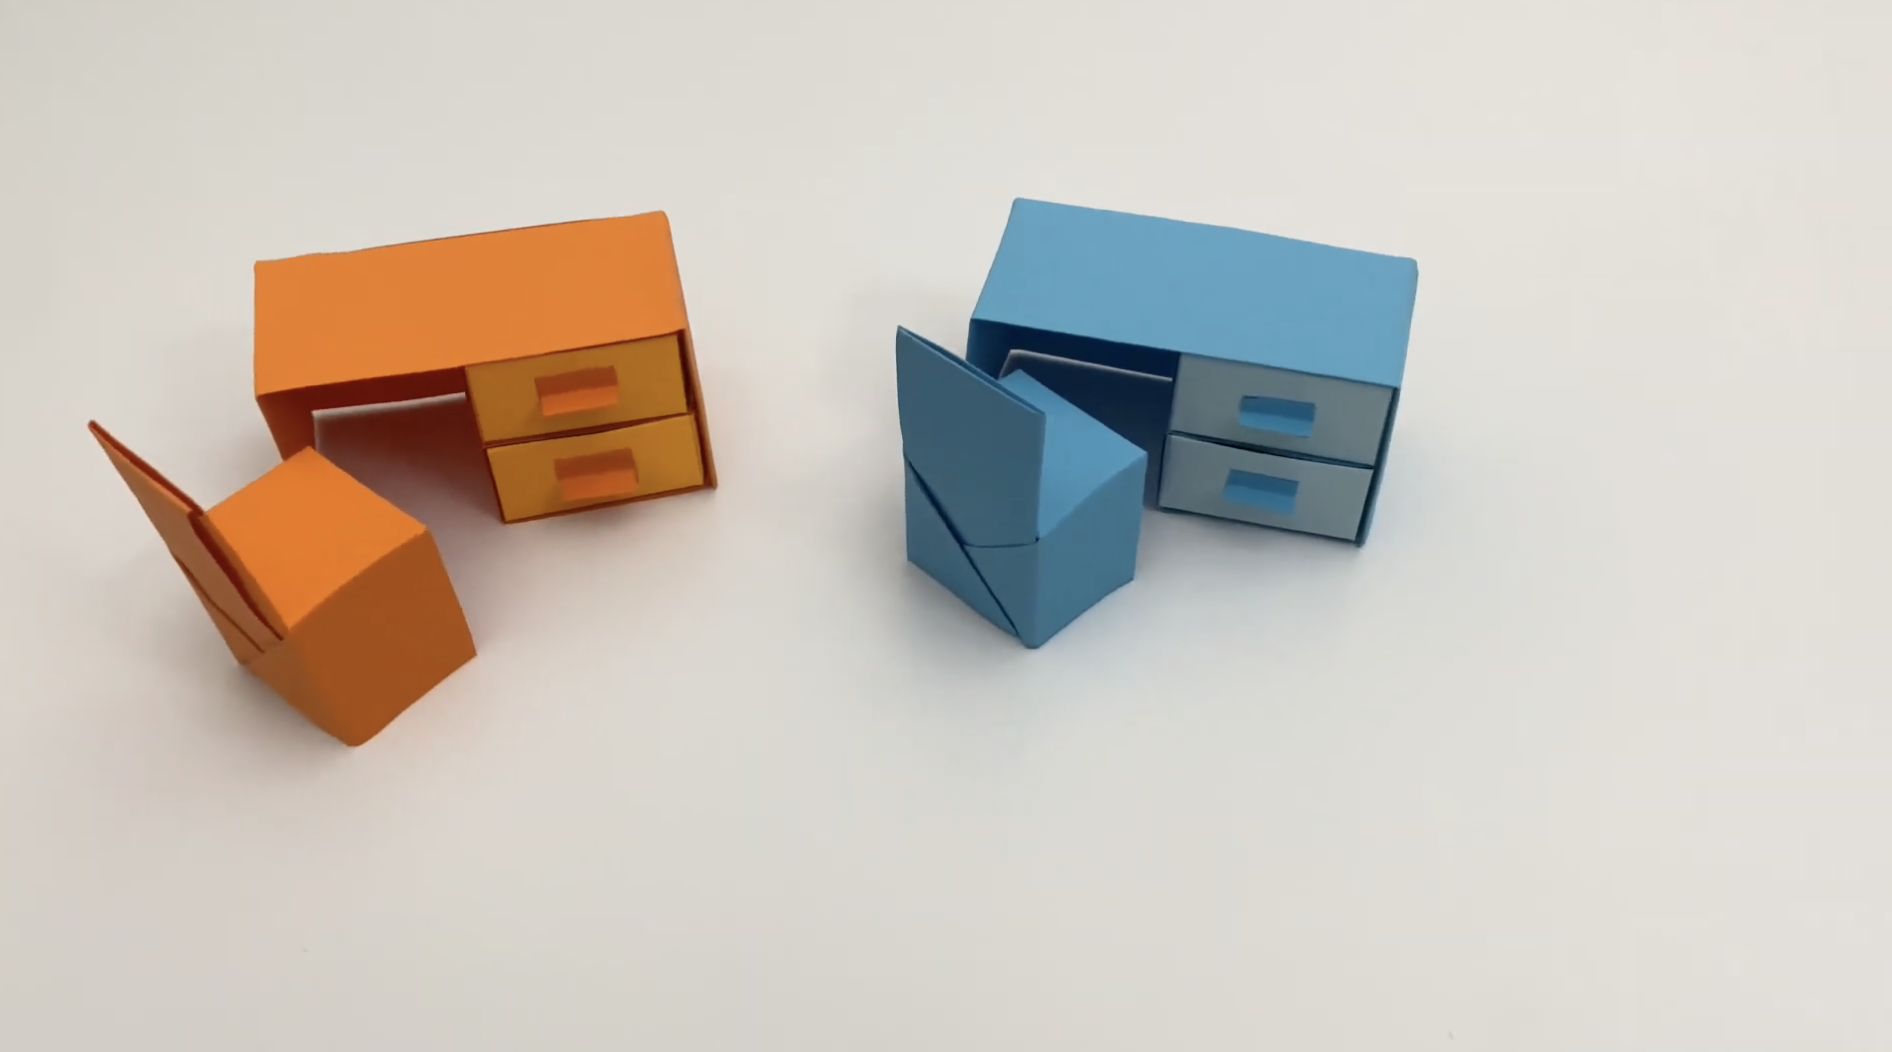
Easy Origami Table and Chair Paper Project
In recent years, origami has seen a great increase in popularity, mostly due to its relative ease. While there are several things you can make with origami, in this article, we will be walking you through how to use origami techniques to build a table and chair.
Easy Origami Table and Chair Paper Project
However, before you begin your origami table and chair, make sure to grab three pieces of origami paper, a pen, and some glue.
1. Make a Diamond with Your Paper
Grab a piece of 15x15cm origami paper and fold it in half twice. Essentially, your paper should be a third of its original length. After this, unfold it once so that your paper now has a line in the middle that should act as a guide.
Next, we will begin to create our diamond. To make this easier you should visualize your paper as a book cover that can be flipped on its outer corner. Grab both the top and bottom outer corner and pull it towards your guideline, making a triangle shape but make sure that you only use the first layer.
Repeat this step for the other corner, then flip your rectangle. You should still have two corners that have not yet been folded so grab these and pull them towards your guideline. This means that you would have made six triangles at this point, leaving you with a diamond-shaped piece of paper.
2. Complete Your Origami Table
Your diamond should have two separatable flaps. Pull them away from each other till they are flat against both sides of your paper. Your origami should now look like half of a diamond. Push against the slanted edges until it is vertical, allowing your paper to stand on its own. Your table is now complete.

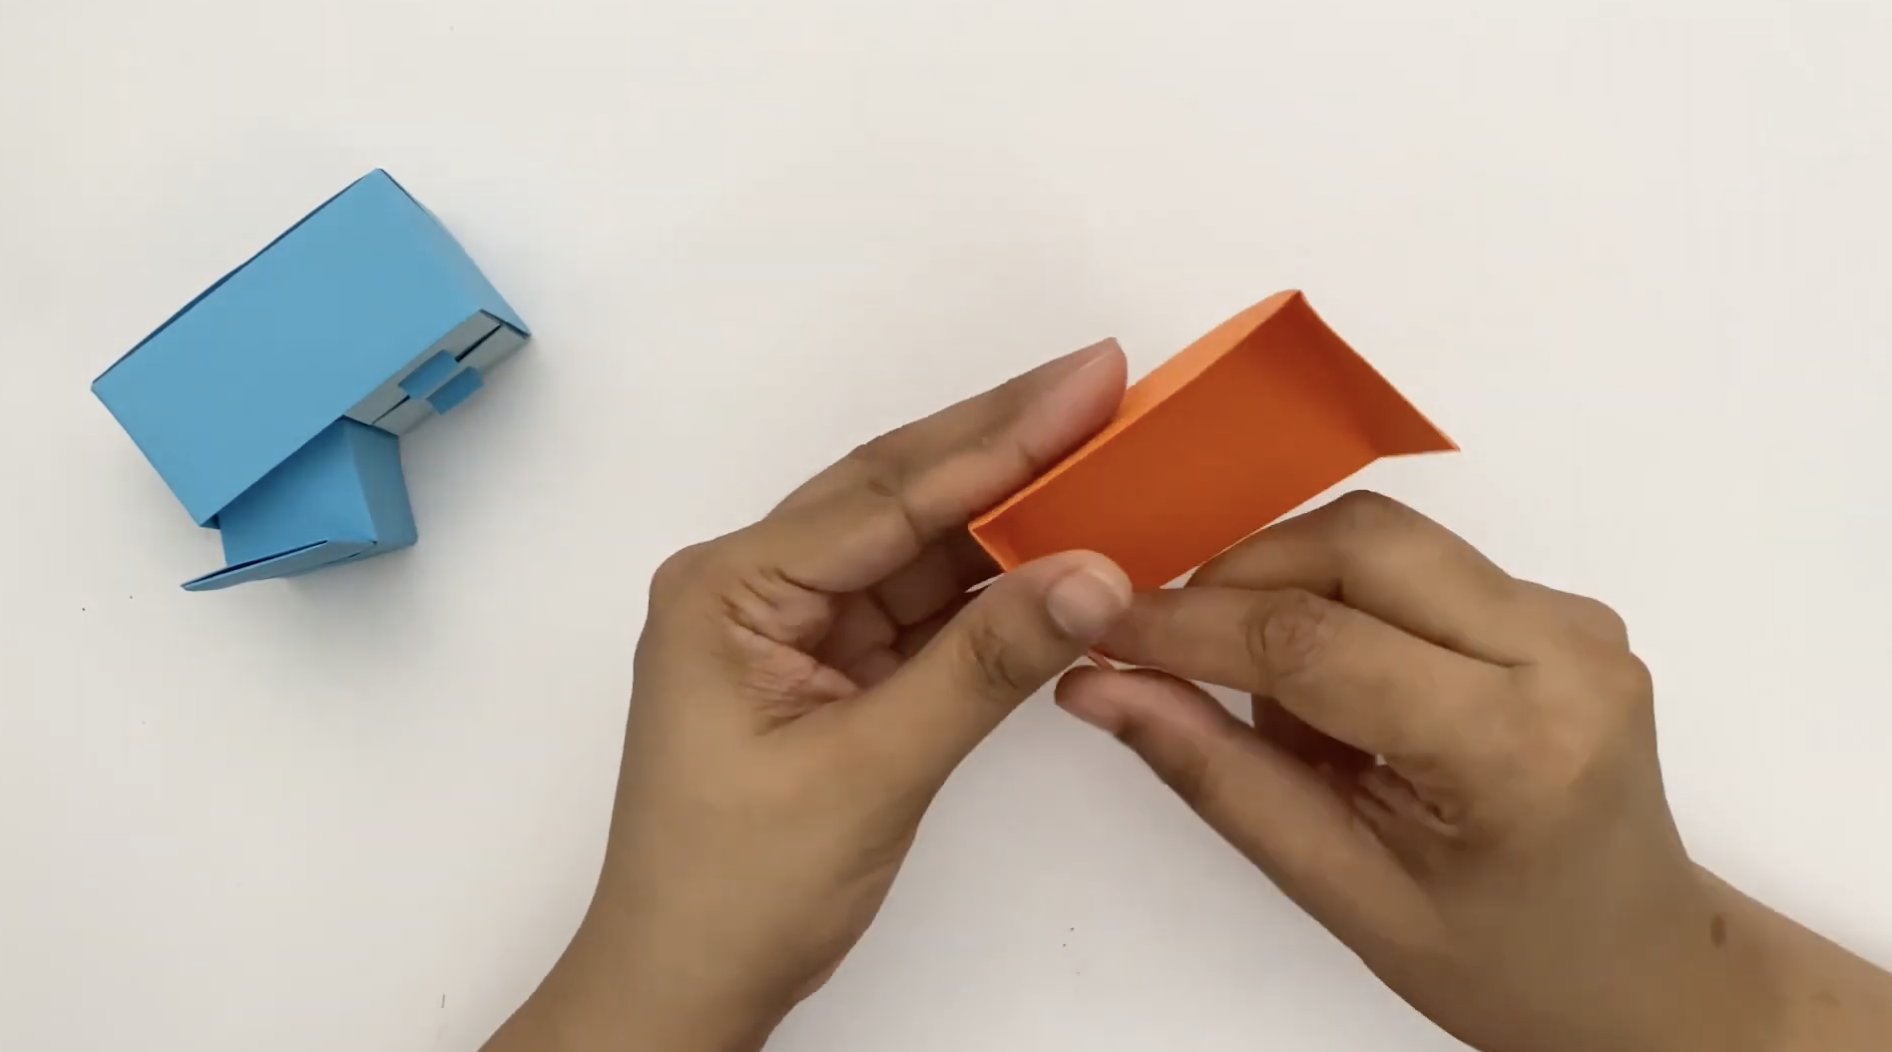
3. Create a Crate
Take each corner of a 10x10cm piece of paper and fold each neatly into a triangle. Your paper should look like it has an “X” in the middle.
Open two of the triangles you made while creating a rectangular fold that will cover the other two triangles. Fold the open edges until your paper forms the shape of a crate.

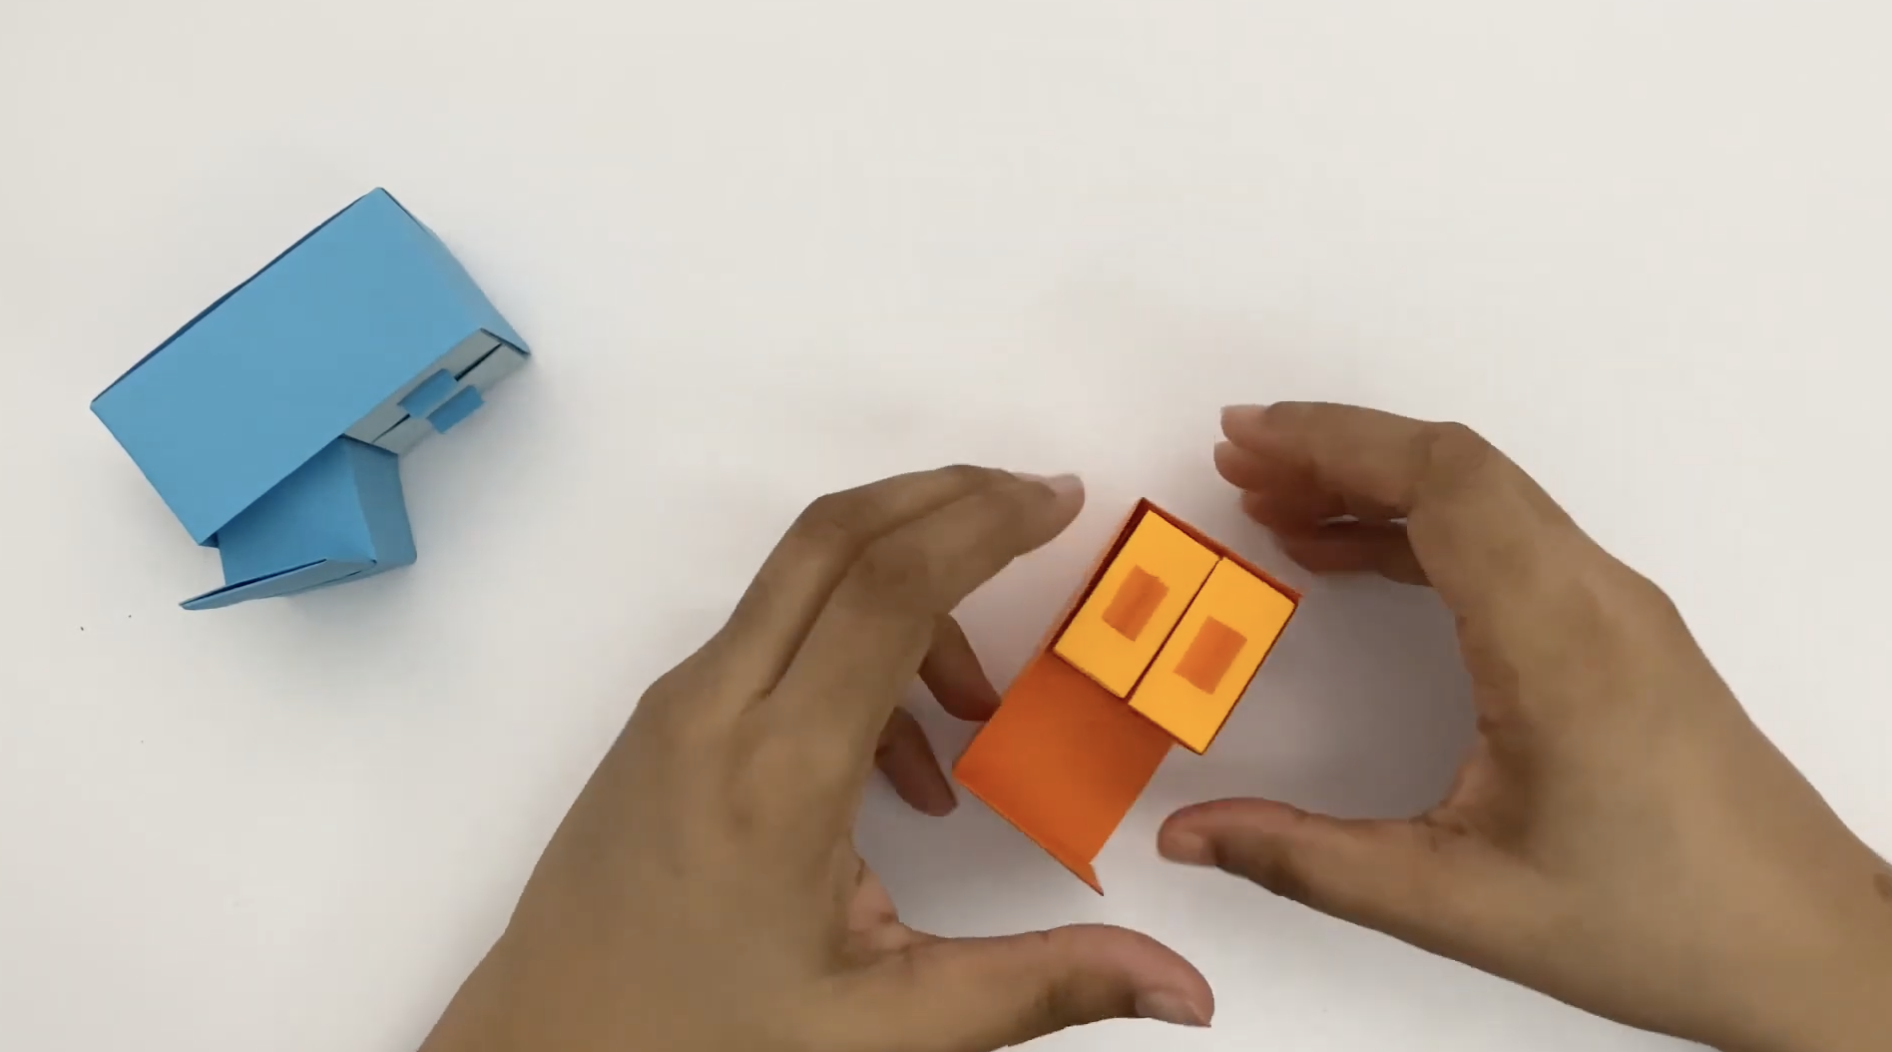
4. Create Your Drawer
Mark where your crate aligns horizontally and vertically on a piece of 3.5x12cm paper. Next, fold along these markings till you create a hollow rectangle. Your paper should have a bit of overlap that you can use a piece of glue to join.
Your crate from the earlier step should be able to fit into your hollow rectangle. So, this will act as a drawer for your table.
5. Create Your Origami Chair
You will need to fold a 9x16cm piece of paper in half. Take the bottom edge and fold it in three, just as you did in step one. However, you will need to only fold the first half once.

Turn your paper so that it is horizontal and fold it into a square, this should have a “+” in the middle with two loose corners at the bottom. Pull these corners to form a triangle where you can tuck any loose edges.
Essentially, your paper should have gained the shape of a funnel. Now, you are almost done. Simply place your hand in the funnel and push against it till its edges are vertical, giving your paper the shape of a chair.
Final Thoughts
The best part about origami is that you can always unfold and begin again. So, if you did not get any of these steps, we suggest that you give it another go. You can also check out the video to help you visualize the structures that you are creating.
For more DIY’s by World Of Art And Craft make sure to check out their Youtube Channel. It has tons of creative crafts that we are sure you are going to love.