St. Patrick’s Day DIY Card

The luck of the Irish is legendary and we wish it to you and your friends with this St. Patrick’s Day DIY Card. This is the perfect card to make to send to anyone because it is fairly simple and will look amazing!
There are a lot of different materials in this card, so substitute with what you have on hand, for the dies, the stamp, and the embossing folders. The main beauty comes from the way the papers play off each other and the stacking of textures. This was a perfect card to explore the contrast between matte and satin papers with the Lime Satin and Cactus. Keep referring to the photos and improvise to suit.
Instructions for DIY Card:
Cut the Moon to 6.75″, score it at 6.75″, and fold over the short side for the front. This fits into a 7″ square Opal envelope, which matches the Opal paper, which is used to extend the front of the card. Cutting the Opal paper to 3.75″ x 6.75″ and using 2 pieces of 1/2″ ScorTape, on the back of the Moon.
I used the full sheet and lined it up on the left side, made sure it was under the ScorTape on the back of the Moon, pushed the front down, and then trimmed the paper.

Here is where the Opal and the Citrine play off against each other so perfectly. These are mica coated papers that have a pearlescent sheen. The Opal sheen is silver when you turn it to the left and gold when turned it to the right. The Citrine sheen is the exact opposite, so together on the Moon, which is matt, the design and the bottom of the front flap change colors from silver to gold as you turn them side to side.
It is a stunning a fun design. You can see the 2 photos for the front of the card, where they are photographed from different angles. The square design is made from the Citrine and die cut with Cheery Lynn FRM 126, Princess Garden Window Frame. It is set closer to the top and it was centered with masking tape, which should not be pressed down.
Using a toothpick and some Cosmic Shimmer Acrylic Glue, apply small dots of glue around the filigree frame; press it down well. When removing the tape from the Moon, it tends to mar the surface, which can be touched up with an acrylic nail file; using a light pencil line might be better
The 4 leaf clovers are made from heart dies, 4 per clover, for good luck. The small 2 clovers are text paper, since Martha Stewart, Embossed Heart punch cuts best with text. The embossing from the punch didn’t show much, so later they were embossed with Cuttlebug’s Embossing Folder, Swiss Dots. After embossing, score them down the middle and fold them up a bit.
Do the same with the Cactus, using the Sizzix, Heart Dies, 1 7/8″ across; 4 hearts and emboss them with Tiny Dots and score them down the middle. Place them where you like them and put some ScorTape or Silhouette Double Sides sheet pieces under them.
Apply Cosmic Shimmer Acrylic Glue to the left side of the heart only arrange them in a circle, on the adhesive tape, with a little opening where the stem would be. Crowd them a bit and fluff up the right side.
Before you put down the Cactus clover, add the vines. They are Sizzix, Flourish # 9 and # 10, made for the Cuttlebug, but works in the Big Shot. Again, use what you have, it will look great with any vine.
After you get the vines and clovers glued down, use the little yellow flowers from Jolee’s Boutique Dimensional stickers, in Cream Floral; placing them here and there behind the flowers and one big one inside the Cactus clover just for color.
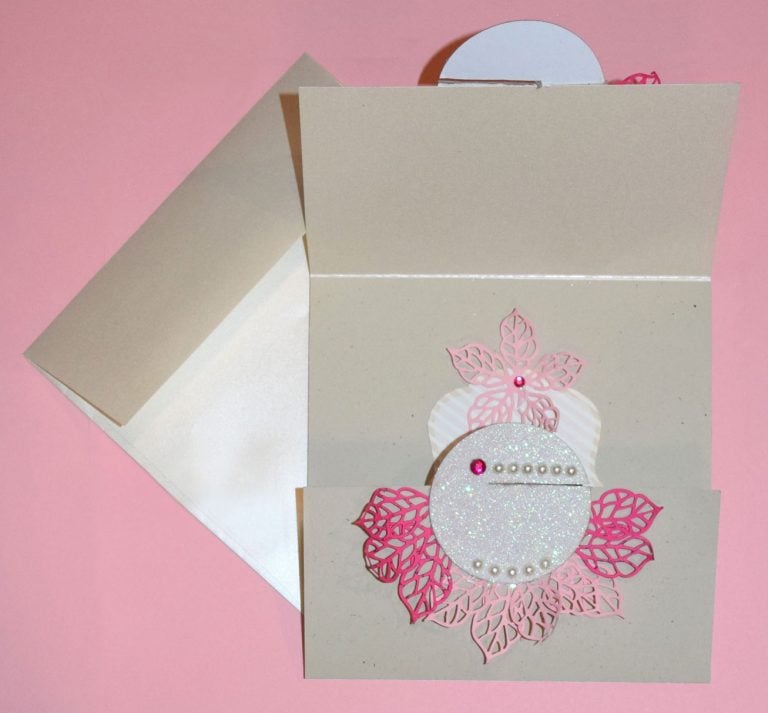
For the inside, using a glue stamp, apply the stamp to Natural Citrus which is a charming paper that is made from citrus residue and made with very green processes. The smooth absorbent surface is nice to print and stamp on, for results that are always crisp.
Using a small fluffy paintbrush, apply some Pearl Ex, Spring Green. This was the predecessor to Tim Holtz, Perfect Pearls, so use anything green and pretty, including green stamping ink. With Pearl Ex, I use a heat gun to set the mica flakes on the glue stamp.
Cut some Cactus to 4″ x 5 7/8″ and center it inside, with 1/2″ ScorTape. Cut the Citrus to 2 5/8″ x 5.5″ and using ScorTape place it on the Cactus. This is offset a bit since the message was offset. Cut some Lime Satin, to 1/4″ x 7″ and back it with 1/8″ ScorTape. Place it at the top fold, inside, and trim it to fit. You are done.
Enjoy!
Materials for DIY Card:
- Stardream Metallics
- Opal, 7-inch square envelope
- Opal, 105 lb cover
- Citrine 105 lb cover
- Lime Satin 80 lb text soon to be discontinued. A good replacement would be Stardream Metallics, Fairway 81 lb text.
- Extract
- Cactus, 88 lb text
- Crush
- Natural Citrus, 81lb text
- Cheery Lynn, FRM 126, Princess Garden Window Frame
- Cuttlebug Embossing Folder, Swiss Dots
- The Tiny Vines: Sizzix, Flourish # 9 & # 10
- Stamp: Good Luck My Friend by Hampton Art, ( still on eBay )
- Martha Stewart Punch, Embossed Heart
- Sizzix Framelits Die Set 6/PK – Hearts ( 1 7/8″ )
- Glue Pad & Refill
- Pearl Ex, Spring Green ( or similar )
- Acrylic Spray Clear Coat ( whatever you have )
- Heat Gun
- Jolee’s Boutique SPJB227 Sticker 3D Cream Floral
- ScorTape, 1/8″ & 1/2″
- Scraps of Silhouette Double Sided Adhesive Sheet or ScorTape